Ashvale: Wild Frontier
Stranded where the ash meets the green, you wake beside a cold firepit with a torch, three berries, and no one. Gather, craft, and build to outlast Ashvale's whispering nights — but the frontier's real secret is its wildlife. Earn the trust of eight strange creatures through patience and offered food, fight beside them, and hunt the corruption to its source. You will not survive Chapter One alone. The beasts remember kindness.
Ashvale: Wild Frontier — Player's Tutorial
Welcome, frontier-walker. This guide takes you from your first swing at a tree to the gates of the Scorched Ring. Read the first three sections to get playing; keep the rest handy as a reference. Light spoilers are marked.
1. Controls at a glance
| Action | Input |
|---|---|
| Move | WASD or arrow keys |
| Aim / attack / place / eat held food | Mouse + Left click |
| Dodge roll (brief invulnerability) | Space |
| Interact / feed / tame / talk to objects | E |
| Sneak (approach shy creatures) | hold Shift |
| Select hotbar slot | 1–6 |
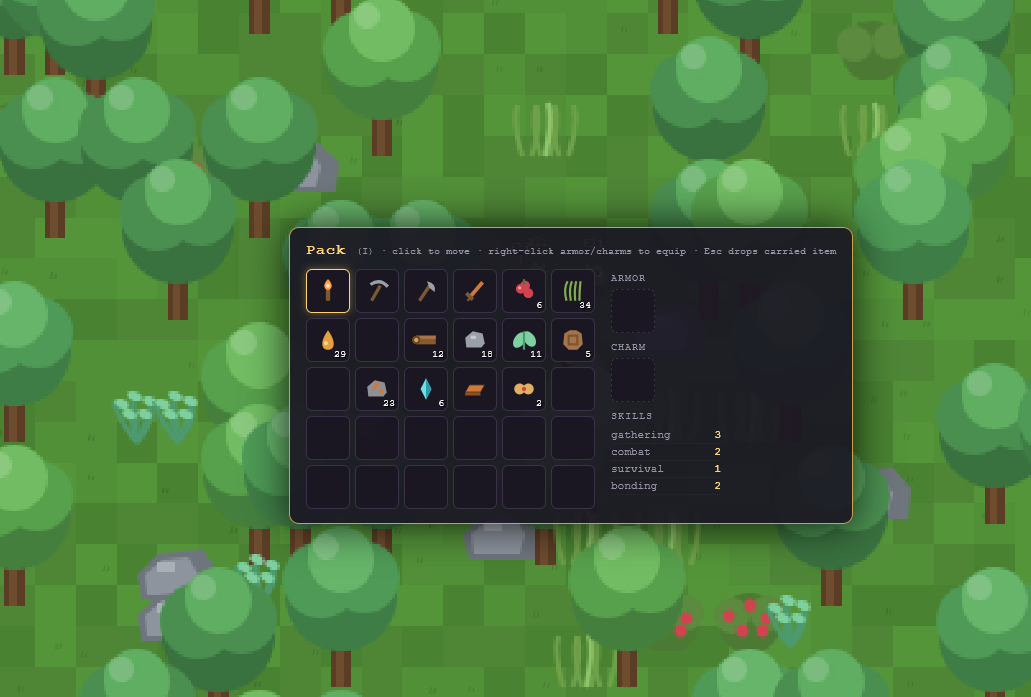
| Pack (inventory & equipment) | I |
| Crafting | C |
| Map | M |
| Creature journal | J |
| Companion command wheel | hold R, aim, release |
| Swap lead companion | Q |
| Recall companions to your side | F |
| Pack up something you built | X |
| Pause / close any menu | Esc |
The game autosaves every 30 seconds. Use Continue on the title screen to resume; Esc → Save & quit when you're done.
2. Your first ten minutes
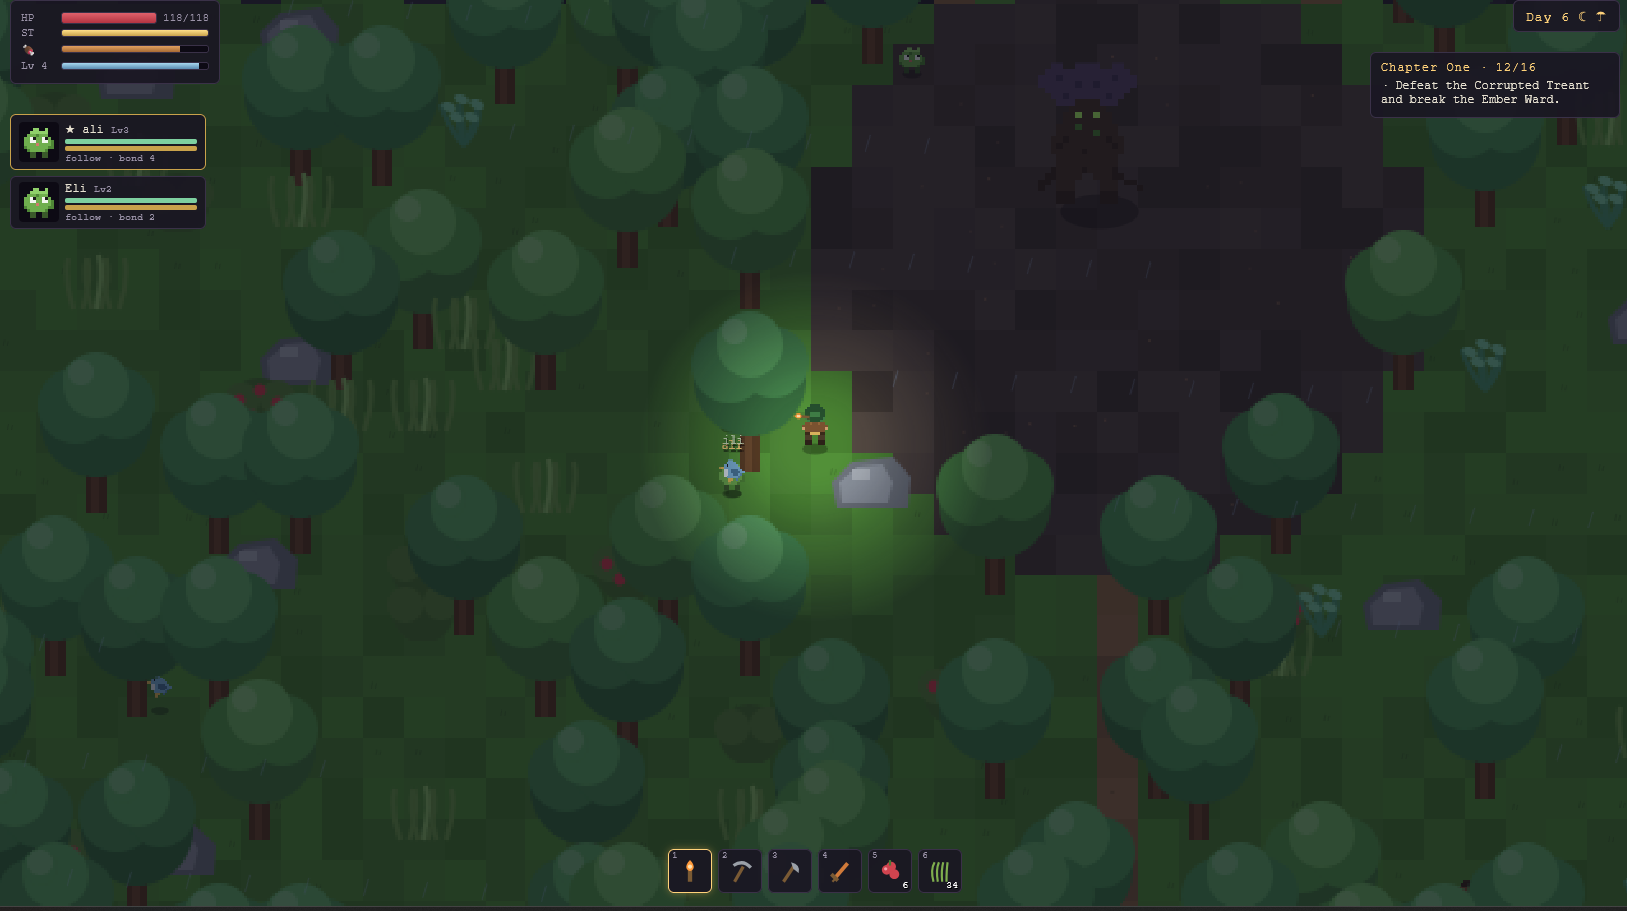
You wake beside a cold firepit with a torch and three Sunberries. The quest tracker in the top-right corner always tells you what to do next — follow it and you can't get lost.
Step 1 — Gather. Punch the small trees and rocks near camp (walk up, aim with the mouse, left-click). Tall grass, berry bushes and other small plants can be grabbed instantly with E or broken with one hit. You need Wood, Stone and Fiber.
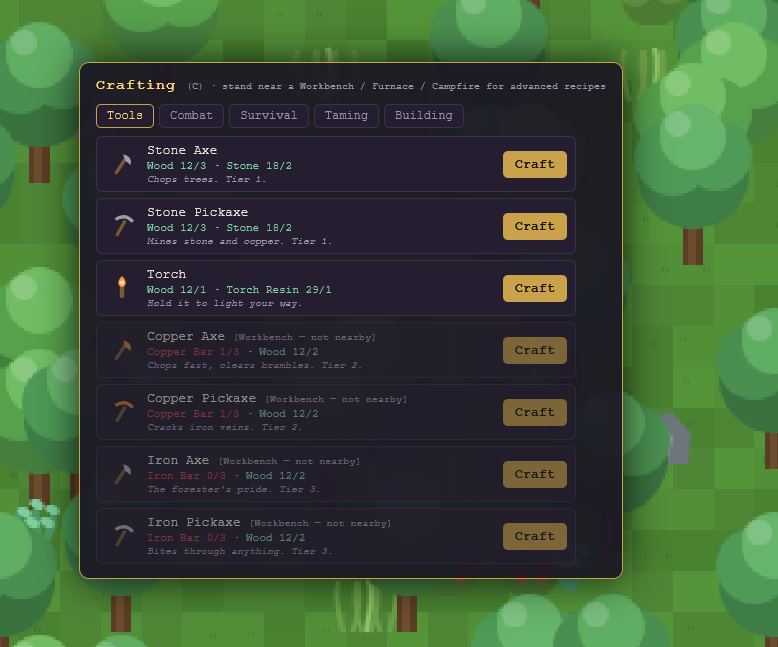
Step 2 — Craft tools. Press C and make a Stone Axe and Stone Pickaxe (no station needed). Put them on your hotbar and select them with the number keys — the selected tool is what your left-click swings. Tools chop/mine far faster than fists and gate what you can harvest (see §5).
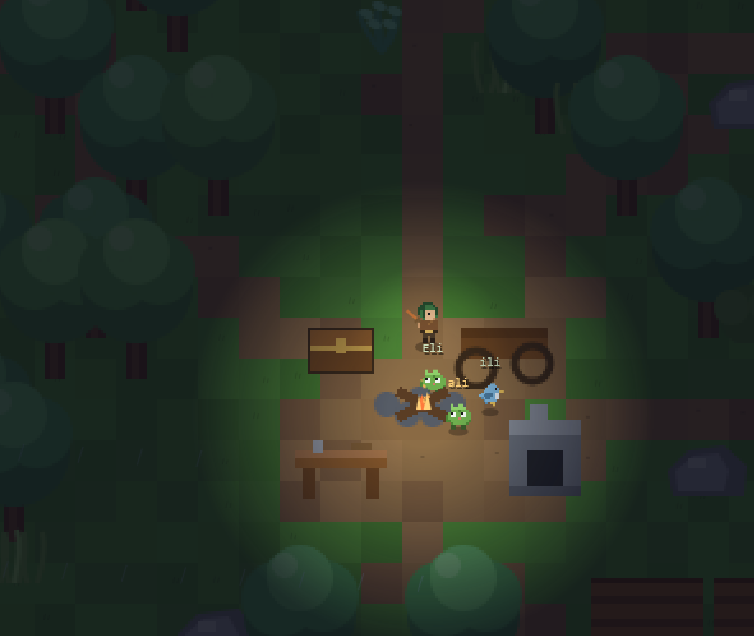
Step 3 — Repair the firepit. Stand at the old firepit with 3 Wood and press E. A lit campfire is your respawn point, your cooking station, and where you manage companions. This one matters — do it early.
Step 4 — Befriend a Mossling. The little green tufts hopping around the meadow are your first companions. Walk toward one slowly (or hold Shift to sneak — running scares it off), then press E to offer a Sunberry. See §7 for how taming works. Congratulations: you are no longer alone.
From here the quest chain leads you east to a ruined cabin, and the real story begins.
3. Staying alive
Health regenerates slowly a few seconds after you last took damage — but only while your hunger is above 25. Healing Salves (2 Herb + 2 Fiber at a Workbench) restore 35 HP instantly: put one on the hotbar and left-click.
Hunger drains slowly all day. Below 20 you'll get warnings; at zero you move slower, stop regenerating, and begin starving. Eat by selecting food on the hotbar and left-clicking. Cooked Meat (raw meat + a campfire) beats raw.
Stamina (gold bar) powers dodges (25), melee swings (3) and bow shots (4). It refills fast once you stop spending it. Never dodge yourself to empty in a boss fight.
Day & night. A full day lasts eight real minutes. At night the world goes dark and corrupted creatures grow bolder — but some creatures only appear after dark. Hold a Torch (select it on the hotbar) to light your way; an Ember Lantern glows from your pack without being held. A Bedroll lets you sleep through the night (E at night): you skip to dawn, heal 40%, and your companions fully recover their energy.
Weather — rain and fog roll through; in the far east, embers drift on the wind. It's atmosphere, not danger.
Death isn't the end. You drop 10% of each stack of resources and food where you fell — walk back and pick it all up — then respawn at your last campfire with 60% health. Bosses reset if you fall.
4. Combat
- Melee left-clicks chain into a 3-hit combo — the third swing hits ~40% harder. Keep your rhythm.
- Dodge (Space) gives a short burst of invulnerability. Enemy attacks are telegraphed: a red ring or line appears first. Dodge on the flash, not before.
- Bow (5 Wood + 5 Fiber at a Workbench) fires wherever your mouse points and needs Arrows (crafted in fives). Ideal for skittish targets and safe chip damage on bosses.
- Status effects — fire burns over time, poison ticks and slows, some blows stun. They work on enemies too: your companions apply plenty of them.
- Whatever you hit becomes your mark — companions on the Attack command will focus it.
- Wolves call their pack when struck. Pick fights with strays, not families.
5. Gathering, tools & tiers
Tools have tiers, and so do resources:
| Resource | Needs | Where |
|---|---|---|
| Trees, rocks | fists work, Tier 1 tools are far faster | everywhere |
| Copper ore, Crystal Shards | Stone Pickaxe (Tier 1) | the cave |
| Bramble walls | Copper Axe (Tier 2) | edge of the pines |
| Iron veins | Copper Pickaxe (Tier 2) | deep cave & east |
Plants (berries, fiber grass, glowcaps, herbs, emberblooms) are picked instantly with E or one hit of anything. Everything you break respawns in a couple of minutes — except story obstacles, which stay open forever.
Your Gathering skill levels as you harvest, speeding you up. A Stone Warden companion standing beside you makes mining dramatically faster.
6. Crafting & building
Press C. Recipes are grouped into Tools, Combat, Survival, Taming and Building. Each recipe lists its station:
- Hand — anywhere (stone tools, campfire, workbench, basic treats).
- Workbench (8 Wood + 4 Fiber) — most gear, weapons, taming supplies.
- Furnace (12 Stone + 4 Wood, needs a bench to craft) — smelts copper and iron bars for better tools, weapons and armor.
- Campfire — cooking.
Stand within a few steps of the station and the recipe unlocks. To build, craft the item, select it on the hotbar, and left-click a highlighted tile (green = valid). Press X near anything you built to pack it back into your inventory — nothing is ever wasted. Useful structures: Chest (20 slots, E to open, click stacks to move them), Bedroll, Feeding Trough (companions rest and recover faster near it), Door, walls, and the grand Creature Sanctuary.
Equipment goes in your Pack (I): right-click armor or a charm to equip it. Armor reduces damage; charms grant regen, damage or critical hits.
7. Taming — the heart of Ashvale
Every tameable creature is a puzzle with three parts: the condition, the food, and the trust dance. Check any creature's entry in the Journal (J) once you've seen it — it tells you exactly what it wants.
The trust dance:
- Meet its condition (below), get close, press E. A pink trust bar appears — you're in a taming session. Stay close; wandering off ends it.
- Press E to offer food from your pack (its favorite gives more trust).
- Sometimes a golden ring starts shrinking toward a green ring — press E the moment they overlap. Perfect timing is a big trust boost; flinching early or late loses a little.
- Never hit it — damage during a session shatters trust, and an angry reject may attack. At full trust, it's yours: name it and it joins you.
| Creature | Where | Condition | Food to offer |
|---|---|---|---|
| Mossling | meadows | approach slowly / sneak | Sunberries |
| Razorboar | meadows, pines | wear it below half health | Root Bundle |
| Ash Wolf | pines | weaken it, or let it watch you slay 2 corrupted beasts | Raw Meat |
| Stone Warden | cave | carry a Rune of Kinship, wait until calm | Crystal Shard |
| Ember Wisp | marsh/east, night only | carry a lit Ember Lantern — it drifts to you | Ember Core |
| Bog Toad | the marsh | always willing | Glowcaps (twice) |
| Skyplume | meadows, pines | approach slowly | Seed Mix |
| Cinder Lynx | Cinderwild nights, rare | weaken it below half | Ember Treat |
All taming supplies (treats, Root Bundle, Seed Mix, Ember Treat, the Rune, the Lantern) are in the Taming crafting tab. Generic Creature Treats (2 Sunberries + 1 Raw Meat, by hand) work on almost everyone in a pinch.
8. Living with companions
Two companions travel with you; the rest of your roster (up to 12) waits at camp. Press E at any campfire or Sanctuary to swap who's active.
Commands — hold R and flick the mouse: Follow, Attack (your mark), Defend (guard you), Stay, Gather (forage nearby), Retreat, Ability! Commands go to your lead (starred portrait) — press Q to swap leads, F to whistle everyone back to your side.
Abilities cost energy and have cooldowns (the thin gold bar and side meter on their portrait):
| Companion | Ability | Passive perk |
|---|---|---|
| Mossling | Healing Pulse (20s) — heals you & partners | healing aura; forages berries & fiber |
| Razorboar | Stun Charge (12s) — dashing stun | digs up stone & copper on Gather |
| Ash Wolf | Rallying Howl (25s) — attack-speed buff for everyone | scents rare creatures |
| Stone Warden | Ground Slam (22s) — AoE + taunt | you mine much faster beside it |
| Ember Wisp | Light Zone (20s) — burning circle of light | living lantern; reveals hidden caches |
| Bog Toad | Poison Cloud (18s) — aimed toxic pool | sniffs out fungi & herbs |
| Skyplume | Survey (30s) — big map reveal, pings chests | warns of ambushes; wider map reveal |
| Cinder Lynx | Fire Dash (10s) — blink strike through enemies | crits often, dodges blows |
Bonds. Fighting, feeding and time raise a companion's Bond (1–5). Feeding its favorite food (E while standing next to it) heals it 30% and gives the biggest bond jump; treats are next best. Bond 5 empowers its ability with a much shorter cooldown. Companions also gain levels from shared kills — more health and damage.
Companions never die. Beaten, they collapse exhausted and recover on their own — much faster beside a campfire or trough — or instantly with a Revival Tonic (2 Herb + 1 Crystal + 1 Ember Core). Carry one for boss day. Trust me.
9. The road through Chapter One (mild spoilers)
The quest tracker walks you through all of this, but broadly: the scorched journal in the ruined cabin points you at the corruption. Crack the cave open for crystals and copper, forge Tier-2 gear, then chop through the bramble wall into the Whispering Pines with a second companion at your side. In the blighted grove waits the Corrupted Treant — your first real fight (see below). Felling it drops the Ember Wards, opening the pass east to the Cinderwild. Repair the old bridge if you want the marsh's shrine and its gifts on the way. In the east: brew a Revival Tonic, then step into the ring of scorched stone. It will not open for anyone who walks alone.
Corrupted Treant tips — it's slow; circle it. Dodge sideways through the three-thorn volleys, kill its summoned saplings fast, and back out of the grove entirely if you need to breathe (it returns to its roots and you can re-engage). A ranged companion or your bow makes it a patience game.
Cinder Stag tips — the arena seals behind you. It fights in three phases: below two-thirds health it rains rings of embers (walk through the gaps, don't panic-dodge) and calls Emberlings; below one-third it enrages and speeds up. Its charge leaves a burning trail — never backpedal in a straight line. Bring salves, cooked meals, a full-energy companion and that Tonic. If you fall, the arena reopens and the Stag resets — regroup and try again.
What the Stag leaves behind... press E. Chapter One ends there, but Ashvale stays open: keep taming, keep building, finish your journal.
10. Ten tips the frontier won't tell you
- Campfire first, adventure second. Respawning across the map is misery.
- The third combo hit and a Wolf's Howl together shred tough enemies.
- Shy creatures flee running players — Shift-walk the last stretch.
- A Skyplume's Survey before entering new territory pays for itself.
- Wisps make the cave and night trivial — tame one early if you can.
- Boars on Gather slowly print stone and copper while you do other things.
- Keep 2–3 Salves and a stack of cooked meat hotbarred at all times.
- Hidden caches dot the world — a Wisp's glow or a Skyplume's Survey finds them.
- Feed favorites daily; Bond 5 abilities are genuinely game-changing.
- Everything you build packs up with X — your base can move with you.
Good luck out there. The beasts remember kindness.
Leave a comment
Log in with itch.io to leave a comment.